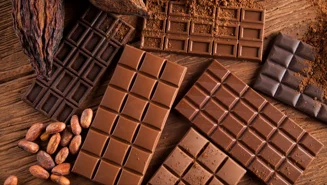
Indulge in a perfectly silky and smooth hot chocolate at home with our hot chocolate recipe
Hot Chocolate Key Ingredients:
- Drinking chocolate
- Chocolate pieces
- Arla Barista milk
- Sugar, syrup or sweetener
- Marshmallows, cream or other added extras
Equipment needed:
- Coffee machine
- Milk jug
- Mug
- Spoon or stirrer
Hot Chocolate Jargon Explained
- Aerate – Adding air to milk with micro-bubbles. It increases the volume of milk and creates a silky, fluid milk to add to your hot chocolate.
- Steaming – Steaming the milk using your coffee machine for the aeration process.
- Dispense time – How quickly a coffee machine dispenses your drink. It can affect the taste.
How To Make A Hot Chocolate At Home
Hot Chocolate Recipe Step-By-Step Method:
Step 1: Espresso machine: Ready to go
Preheat your espresso machine so that the steaming function is ready to use.
Step 2: Measure your chocolate portion
Create your desired portion of chocolate to suit your cup size and preferred intensity, colour and chocolate flavour level. Coffee shops use anywhere from 15g up to 25g depending on the chocolate, so there is plenty of scope for experimentation. Our advice would be to start at 20g and try making drinks with chocolate powder or chocolate pieces (sometimes known as callets). Many expert chocolate drink designers use freshly melted, high cocoa content chocolate where the sugar content is lower. This emphasises the flavour notes of chocolate over the sweetness of the sugar.
Step 3: Turn that chocolate into liquid
Melt, mix or soften the chocolate you are using. For this, we usually use some boiling water to quickly soften chocolate pieces, around 30-40ml so as to not dilute the flavour. This is almost like making a chocolate version of an espresso shot!
Step 4: Steam your milk for a silky foam
Next, steam your Arla Barista milk. For hot chocolate, we recommend aiming to grow the milk by around a third of its volume for a silky foam. Your priority when steaming milk is to aerate the milk to the required volume. Secondly, break down the larger bubbles you have created (if any) with some motion in the jug like a whirlpool. Finally, send your focus to finishing at 60-65C.
For steaming, place the steam wand in the jug so the milk can spin a little as it steams. Place the steam wand into the milk no more than 2cm deep. Listen for a gentle chirping or paper-tearing noise that tells you when you are adding tiny micro-bubbles correctly. If the noise you hear is loud and screeching as the milk warms, you have not aerated the milk enough and may need to try again. If larger bubbles are appearing and the noise is a little chaotic and deeper, try raising the milk jug to deepen the steam arm a little. It can take a few tries to figure out the ideal positioning but you’ll get there.
Step 5: Stop steaming
Finish the steaming process at 60-65C (use a thermometer until you get the feel of when you’ve reached the right temperature).
Step 6: Don’t forget a quick clean
Make sure you clean the steam wand on your coffee machine straightaway. This is always good practice as the milk can dry very quickly and leave a residue on your machine.
Step 7: Polish your milk
Swirling the milk and tapping it on the counter will burst any larger bubbles and ensure the final product is silky and polished. You should do this immediately after your cleaning step.
Step 8: Mix your milk and chocolate
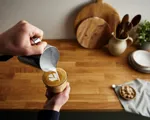
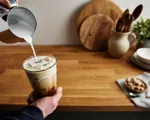
Pour the milk into the liquid chocolate base within 20 seconds of finishing the steaming process. This is to ensure your milk doesn’t lose its steamed texture before being combined with the liquid chocolate.
Step 9: Latte art
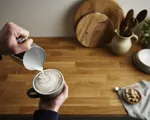
You can create some beautiful designs on your hot chocolate using the same technique as latte art. It’s a good idea to first master a heart design which is simpler to create. However, it will still take finesse and practice to refine your work! Mastering pouring speed, angles, texture creation, and motor skills are all needed to create more complex latte art. Just take a look on YouTube and you’ll find no end of instructional videos and inspiration!
Expert Tips For Your Hot Chocolate
Hot chocolate can be made in all sorts of ways, but we’ve got some professional tips for you to up your hot chocolate-making skills.
Hot Chocolate Milk Aeration
If you want to add latte art to your hot chocolate, aim for light aeration - adding about one-third of the original volume when you steam it. If you want a frothier hot chocolate with a deep foam like a cappuccino, increase the volume even further when steaming. Also keep this in mind when adding toppings like marshmallows or sprinkles, as a deeper foam will act like a fluffy pillow on top of the hot chocolate.
Choosing Your Chocolate Type
Use darker chocolate for richer colours and intense cocoa flavour, and milkier chocolate to lighten the colour and add sweetness. A good place to start is to create a chocolate paste with your desired chocolate mixed with a little boiling water to soften it, before whisking/stirring to make an espresso-like liquid base. You can also create an extra-luxurious finish by using a fine grater to grate thin swirls of chocolate onto the drink’s surface.
Hot Chocolate Art
Making a perfectly dark and rich hot chocolate makes for an amazing background to pour your Arla Barista steamed milk onto for latte art designs. If latte art isn’t your thing, you could simply add chocolate pieces to the milk before steaming. While steaming the milk, tilt the jug to create a little whirlpool effect which will help to mix the chocolate pieces into the milk before pouring into your cup.
Hot Chocolate Cup Sizes
When it comes to cup sizes in your average coffee shop, we often see hot chocolate served in mugs from 240ml up to 320ml to guarantee a strong but balanced flavour between cocoa and milk notes.
Hot Chocolate FAQs
How many calories are in hot chocolate with milk?
On average, there are between 190 to 250 calories in a 240ml hot chocolate using whole milk .
